
Tweetmerge — A mailmerge for Twitter
If you’ve ever wanted to send the same tweet to a mailing list of twitter handles, this tutorial is for you.
Pre-requisites
You’ll need to be using Mac OS (OSX). Any version will work. If you’re on Windows, you’ll need to be using something like Cygwin (and you’re on your own!)
You’ll need an account with the CoSchedule social media scheduling package, and know roughly how to use it
What is TweetMerge?

Much like a mailmerge, tweetmerge is going to bring together a list of recipients (twitter handles) and a template tweet to create a mailing list of tweets that are going to be posted automatically when you’re good and ready.
Preparation
If you don’t have a grown-up text editor like macvim, you’ll be using the native Mac OS text editor — textedit.app for this exercise. This is fine but to work properly, you are going to have to change the default configuration. It’s a quick and easy change.
Firstly, jump to Spotlight by hitting Cmd+Space, then type in TextEdit and hit return.
Open up the TextEdit preferences and change the default Format to Plain text.

Change the TextEdit Format default otherwise things will break
Getting the tweetmerge files
The merge process requires three text files. Download each one by clicking on the links immediately below:
Defining the tweetmerge
Now we need to edit the tweet template and the handles file to reflect what we want to send and who we want to send it to. Open Finder and navigate to the Downloads directory. Open the handles.txt, tweet.txt and tweetmerge.txt files in TextEdit.

handles.txt
Edit the handles file and add in the handles that you want to reach as part of this campaign.
All of the recipients of our tweetmerge are defined in a text file called handles.txt. Edit the handles file and add in the Twitter handles of those people (one per line) that you want to reach. Save and close when you’re done. Ensure that the file is saved as a .txt file and not an .rtf file. If it’s the latter, then you’ll need to change the default format (see above) and start over.
Note: CoSchedule has an upper limit of 365 posts per upload, so if you’re mailing list is longer than this, you’re going to need to create multiple handles files and repeat the merge and upload process for each.
tweet.txt
There are four parts to the tweet template, each separated by a comma…

The body of the tweet (inside double-quotes)
The first part of the tweet is the body (text) delimited by double-quotes. The phrase <REPLACE> will be replaced by the recipients in the handles.txt file during the merge process. Leave this as is when editing tweet.txt. Following the <REPLACE> placeholder, include the text of your tweet plus line breaks and any hashtags. If you are including a link in your tweet, keep in mind that the total length needs to be 280 characters max else it will be automatically truncated by Coschedule. Edit the text accordingly.
The link
After the text of the tweet, there’s the link. The example uses a YouTube video but could also point to an image (for example hosted on Pinterest). If your tweet doesn’t reference a link, leave then remove the link URL altogether (leaving two adjacent commas).
The post date and time
The next data item is the post date. This is in YYYY-MM-DD format. No other formats are supported by CoSchedule. Type in the date. Following that you can specify a time to post.
The last data item is the time that the tweet will go out. The time should be defined in 24 hour format HH:MM. Alternatively you can use the keyword ‘best’ and CoSchedule will work out the best time to post the tweet. Using ‘best’ is going to distribute the posts throughout the day, and that is the preferred method.
Once you’ve finished editing the tweet file, save it and you’re ready to do the merge.
Running tweetmerge
The tweetmerge logic is a tiny snippet of Mac OS shell script. This means that you are going to need to open a Terminal window to run it. Before we do that, flip to TextEdit, and highlight and copy all of the text from tweetmerge.txt.
Next, hit Cmd+Space to launch Spotlight and type ‘terminal’ and hit return. You should see a $ prompt in a new window.

We now need to change to the directory where the tweetmerge files are located. If you have just downloaded them, they are going to be in the Downloads directory. To get there enter the following at the $ prompt and hit Return:
cd ~/Downloads
Note that the squiggle-looking symbol is (usually) top left-ish on Mac keyboard
Still in the Terminal window, hit Cmd+v to paste in the tweetmerge code that you just copied from TextEdit. And hit Return to run it. A new .csv file will be created in the Downloads directory called coschedule.csv. This file contains the tweets ready to be uploaded into CoSchedule.
Uploading the tweets to CoSchedule
The upload option is strangely hidden in Coschedule. To find it, go into the Calendar and hit Create. Then look for the 3 dots symbol, click on that and hit Upload.
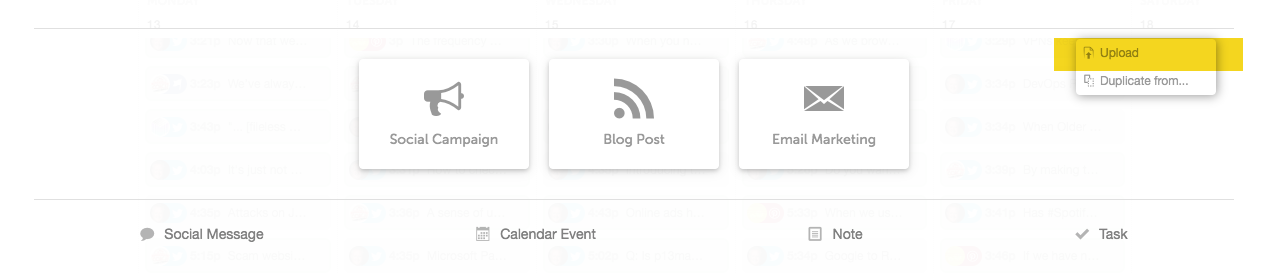
Hit the 3 dots symbol to reveal the upload option
Hit Social Message, Next, Create New (give your campaign a name). The system is then going to ask for you to select the coschedule.csv file. Navigate to the Downloads directory, highlight the coschedule.csv file and hit Open. Select the Twitter profile that you want the tweets created for. Hit Preview Messages.
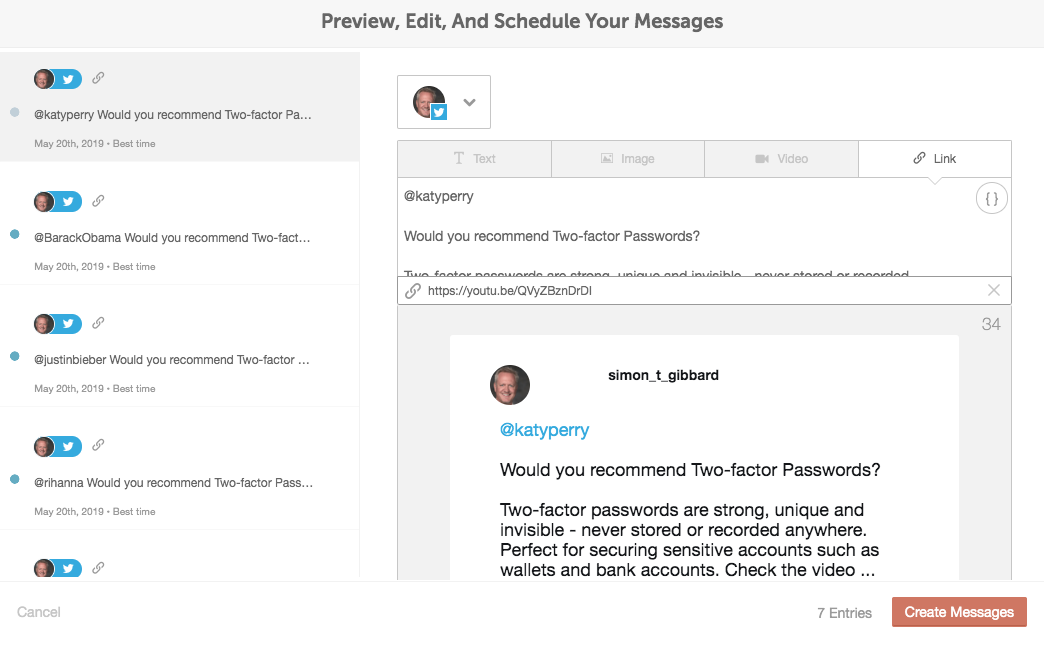
Check that no posts are being truncated and post timings are good to go.
Check that all posts are in order and hit Create Messages. The system will cycle through the CSV file creating one post per recipient. And you’re done!
If you have any questions or requests, you can reach me on Twitter or LinkedIn.